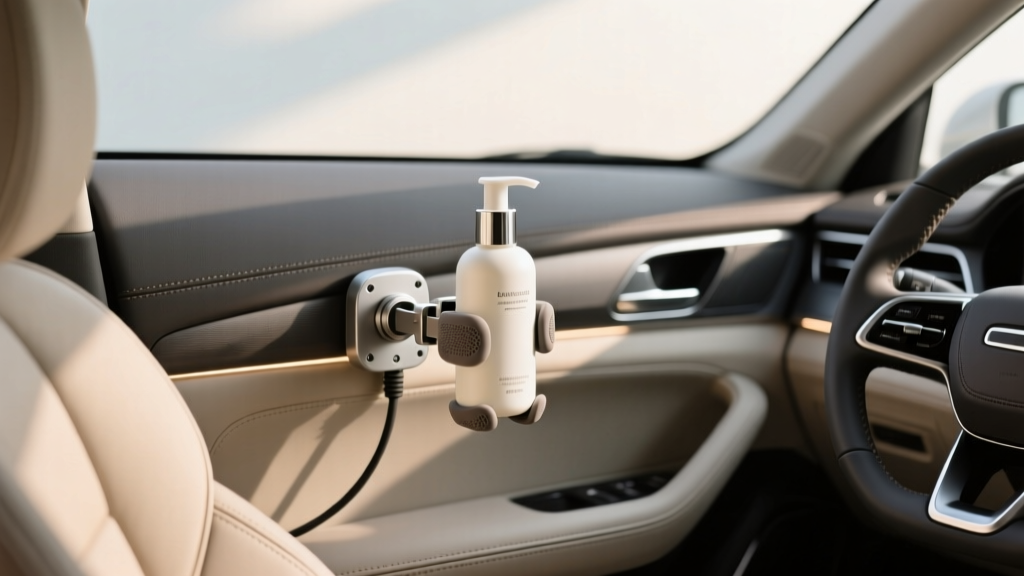
Lotion Bottle Holder Customization | CarInteriorMix
Between hand sanitizer, sunscreen, leather conditioner, and plain old hand lotion, most drivers keep at least one liquid bottle in the cabin. The problem is that ?one bottle? turns into a rolling projectile the first time you brake hard or take an on-ramp with enthusiasm. Once it tips over, it?s not just annoying?lotion can seep into carpet fibers, gum up seat rails, haze trim, and leave a slippery film on steering wheels and shifters.
A proper lotion bottle holder solves the obvious mess, but advanced customization goes a step further: it makes storage safer, quieter, easier to reach, and better integrated with your car?s interior. Done right, it looks factory, withstands temperature swings, and keeps bottles upright even on bumpy roads.
This guide breaks down pro-level techniques car owners can use to create a secure, rattle-free, interior-friendly lotion bottle holder?whether you want a quick removable setup for a daily driver or a semi-permanent installation that matches your build.
Why a Dedicated Lotion Bottle Holder Is Worth Customizing
- Safety: A loose bottle becomes a projectile in sudden stops. Secure mounting reduces cabin hazards.
- Interior protection: Prevents spills that stain upholstery, weaken adhesives, and attract dirt.
- Convenience: One-hand access means you?re not rummaging around while driving.
- Noise control: Custom fit and padding stop rattles in door pockets and consoles.
- Cleaner look: Better integration with trim colors and textures than generic cup holders.
Plan First: Choose the Right Location and Bottle Style
Best Mounting Locations (and What to Watch For)
- Center console side (passenger side): Easy reach while stopped; keep clear of knee room and passenger airbag zones.
- Door pocket: Convenient, but often too wide?needs anti-tip shims and anti-rattle liner.
- Behind the seat (seatback organizer area): Great for family cars; ensure no interference with seat movement and airbags.
- Lower dash or console face: Clean install potential; avoid drilling near wiring harnesses and SRS components.
- Cargo area side panel (SUVs/trucks): Ideal for bigger pump bottles; keep away from unsecured gear.
Pick a Bottle That?s Holder-Friendly
Customization gets easier when you choose bottles that are stable and consistent in size. Look for:
- Shorter, wider bases for stability (less likely to tip).
- Locking pump tops or flip caps to prevent accidental dispensing.
- Leak-resistant threads and gaskets (especially for travel bottles).
- Opaque or UV-resistant plastic for products that degrade in sunlight.
Core Customization Methods (From Removable to Semi-Permanent)
Method 1: Console/Seat-Rail Clamp Mount (No Drilling)
This approach is popular because it?s secure and reversible. A clamp mount attaches to a seat rail bolt, console edge, or accessory bracket, then holds a ring-style bottle cage.
Step-by-Step: Clamp-Mount Holder Setup
- Measure clearance: Slide the seat through its full range and confirm you won?t pinch wiring or block vents.
- Choose a clamp base: Use a seat-rail compatible mount or a console-side clamp with rubber pads.
- Add a bottle cage: Attach a small utility cage (bike-style or universal cup cage) using stainless hardware.
- Isolate vibration: Add a thin rubber or neoprene layer between mount and interior surface.
- Test for interference: Ensure shifter, seatbelt buckles, and passenger legs aren?t impacted.
- Final tighten: Use threadlocker (medium strength) to prevent loosening over time.
Best for: Daily drivers, leased vehicles, and anyone who wants a sturdy ?bolt-on? feel without drilling.
Method 2: Hidden Dual-Lock + Backing Plate (Clean Look, Strong Hold)
3M Dual Lock is like heavy-duty reclosable fastener?stronger than standard hook-and-loop and excellent for removable mounts. Pair it with a thin backing plate so the load spreads across trim and doesn?t peel.
Step-by-Step: Dual-Lock Holder with Backing Plate
- Pick a flat-ish area: Console side panels work well. Avoid textured, oily, or soft-touch rubbery surfaces unless you test adhesion first.
- Clean thoroughly: Use 70% isopropyl alcohol on a microfiber towel. Let dry fully.
- Create a backing plate: Cut ABS plastic or thin aluminum (about 2?3 mm thick) to a size larger than your holder base.
- Apply Dual Lock: Put strips on both the backing plate and the holder base. Press firmly.
- Heat and set: Warm the adhesive gently with a hair dryer (not a heat gun) and press again. Let it cure 24 hours.
- Mount the plate to the car: Apply Dual Lock between the plate and the trim so the trim adhesive isn?t taking all the stress.
- Load test: Insert a full bottle and simulate braking by pushing forward/down. If it shifts, add more Dual Lock surface area.
Best for: A near-factory look with the ability to remove the holder for detailing.
Method 3: Custom Insert for Cup Holder or Door Pocket (Rattle-Free Fit)
If your cup holder is too wide or too deep, a custom insert can hold a lotion bottle securely without adding a separate mount.
Step-by-Step: Make a Simple Custom Insert
- Measure the cavity: Diameter (or width/length), depth, and any taper.
- Choose a material: Closed-cell foam, EVA, neoprene, or a 3D-printed TPU insert works well.
- Build a snug sleeve: Create a ring that grips the bottle, plus a bottom spacer so the bottle sits upright and doesn?t wobble.
- Add a pull tab: A fabric loop makes removal easy for cleaning.
- Test for tilt: Adjust with thin shims until the bottle stays vertical.
Real-world example: A common 16?20 oz lotion bottle often wobbles in a truck?s oversized cup holder. A two-layer insert?firm foam on the outside, softer neoprene inside?prevents clunks on rough roads and keeps the label from scuffing.
Method 4: 3D-Printed Holder (Precision Fit and OEM-Like Styling)
A 3D-printed lotion bottle holder can be tailored to your exact bottle diameter, your vehicle?s mounting points, and your interior design goals. It?s one of the cleanest ways to get a ?made for this car? result.
Design Tips for 3D-Printed Holders
- Use PETG or ASA: Better heat resistance than PLA for hot cabins. TPU works for flexible grips.
- Include drainage: Small holes at the bottom help if the bottle leaks.
- Add a split-clamp ring: A ring with a small gap grips multiple bottle sizes.
- Build in a rubber liner channel: A groove for a silicone band stops squeaks.
- Reinforce mounting ears: Increase wall thickness at bolt points to prevent cracking.
Step-by-Step: Basic 3D-Print Workflow
- Measure bottle and mount area: Bottle diameter at the widest point, plus pump clearance.
- Model the holder: Use a ring-and-base design with mounting holes for an existing screw point or clamp adapter.
- Select print settings: 4+ perimeters, 30?50% infill for strength, and heat-resistant filament.
- Test fit with a ?draft print?: Print a short ring segment to verify diameter before printing the full part.
- Finish and line: Sand contact points and add a thin rubber liner where the bottle touches.
Best for: Enthusiasts who want a precision car interior accessory with minimal compromise.
Advanced Stability and Spill-Proofing Upgrades
Add a Retention System (So the Bottle Can?t Bounce Out)
- Elastic retention strap: Simple, quiet, and adjustable. Works well for pump bottles.
- Silicone band or O-ring: Adds grip and reduces rattles without scratching the bottle.
- Magnetic latch (with caution): Use only for metal brackets and keep magnets away from sensitive items. Not ideal near credit cards or some devices.
Use a ?Drip Zone? to Protect Trim
Even good bottles can seep in heat. Add a mini drip tray approach:
- Rubber coaster liner under the bottle base.
- Absorbent pad (thin microfiber) tucked into a removable bottom cup.
- Drain hole + catch cup in custom holders for off-road or work vehicles.
Anti-Rattle Layering That Looks Factory
- Felt tape: Great between plastics; common in OEM noise-reduction.
- Neoprene strips: Durable and moisture-resistant for bottle contact points.
- Thin EVA foam: Useful for door pockets and cup holder inserts.
Product Recommendations and Smart Comparisons
Mounting Options
- 3M Dual Lock (recommended over basic Velcro): Stronger hold, cleaner engagement, better for heavier bottles.
- Seat-rail clamp mounts: More mechanical security than adhesives; ideal for heavier pump bottles.
- Universal bottle cages: Bike-style cages are lightweight and easy to adapt, but may need a liner to prevent scuffs and rattles.
Material Choices for DIY Holders
- PETG/ASA (3D print): Better for heat; good balance of strength and flexibility.
- ABS sheet (backing plates): Easy to cut, stable, and interior-friendly when edged smoothly.
- Aluminum plate: Very strong; deburr edges thoroughly to protect trim and hands.
Common Mistakes to Avoid
- Mounting in an airbag deployment zone: Avoid A-pillars, dash edges, and areas marked with SRS/AIRBAG. When in doubt, choose a lower console location.
- Using PLA for 3D-printed parts: PLA can soften in a hot car and deform, especially in direct sunlight.
- Skipping surface prep for adhesives: Dirty or silicone-treated trim will cause Dual Lock or tape to fail.
- Overtightening clamps: Can crack trim panels or leave permanent marks. Use rubber pads and moderate torque.
- Ignoring pump clearance: Pump tops can hit the dash or seat during adjustment; test with the seat fully forward/back.
- No secondary retention: A cage alone may not prevent ejection on potholes?add a strap or grippy liner.
Quick Checklist: A ?No-Regrets? Installation
- Choose a location that won?t interfere with seat travel, shifter operation, or airbags
- Verify bottle height and pump clearance
- Add anti-rattle padding anywhere plastic meets plastic
- Use heat-resistant materials (PETG/ASA, neoprene, Dual Lock)
- Test with a full bottle and simulate braking/turning forces
- Make removal easy for cleaning and refilling
FAQ: Lotion Bottle Holder Customization
What?s the best place to keep lotion in a car?
The center console side or a secure cup holder insert usually gives the best balance of reach and stability. If you carry passengers often, consider a seatback or rear console location to keep it out of the front footwells.
Will heat ruin lotion or cause bottles to leak?
Heat can thin some lotions and increase pressure inside bottles, which makes leaks more likely?especially with pump tops. Use a locking pump or flip cap, keep the bottle out of direct sun, and add a drip liner in the holder.
Is adhesive mounting strong enough for a full bottle?
It can be, if you use a high-quality option like 3M Dual Lock, prep the surface correctly, and spread the load with a backing plate. For the heaviest pump bottles or rough roads, a clamp mount is more reliable.
Can I mount a holder without drilling holes?
Yes. Clamp mounts, Dual Lock setups, and custom cup-holder inserts are all no-drill solutions. If you want an OEM look, a 3D-printed holder attached to an existing screw point is another clean option.
How do I stop rattles in a plastic holder?
Add a thin neoprene or felt liner where the bottle touches and where the holder touches interior panels. Silicone bands around the bottle also work well and are easy to replace.
What bottle size works best for a car interior holder?
Travel sizes (2?4 oz) are easiest to secure and less likely to leak messily, but many drivers prefer 8?12 oz for convenience. If you carry 16?20 oz bottles, prioritize mechanical mounting and a retention strap.
Conclusion: Build a Holder That Matches How You Drive
A lotion bottle holder should feel like a natural part of your car interior: stable on rough pavement, quiet over bumps, easy to reach when parked, and simple to remove for cleaning. Start by choosing the safest location, then decide whether you want a removable approach (cup-holder insert or Dual Lock) or a more robust mount (clamp or 3D-printed bracket). Add anti-rattle lining, a retention strap, and a small drip zone, and you?ll eliminate spills while keeping your cabin looking sharp.
Next step: pick one method from this guide and do a quick mock-up using cardboard or painter?s tape before committing to hardware or adhesive. That five-minute test usually prevents the biggest fitment mistakes.
For more practical car interior upgrades, maintenance tips, and customization ideas, explore the latest guides on carinteriormix.com.